Koss Industrail Logo

Understanding Clean-in-Place (CIP) Meaning and Its Importance in Food Safety

Understanding Clean-in-Place (CIP) Meaning and Its Importance in Food Safety

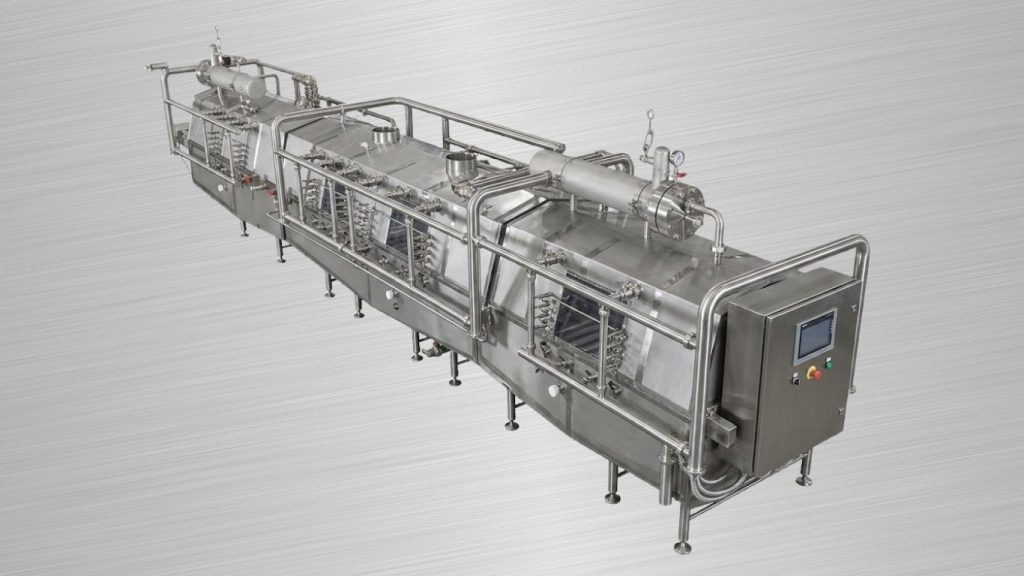
The meaning of CIP shapes how food and beverage producers approach modern sanitation programs. Clean-in-place (CIP) systems clean the interior of tanks, pipelines, and equipment without requiring full disassembly between cycles. For dairy, cheese, and beverage producers, CIP is the backbone of a compliant food safety program.

A well-designed CIP system protects product quality, reduces contamination risk, and supports regulatory compliance every run. Operators rely on it to deliver consistent cleaning results without pulling equipment offline for manual scrubbing. Understanding how CIP works helps you build a sanitation program your auditors and your team trust.

What Is the Meaning of CIP?

CIP stands for clean-in-place, a method that cleans equipment interiors without taking the system apart. The process circulates water, alkaline and acid solutions, and sanitizers through tanks and piping in a controlled sequence. CIP delivers repeatable, documented cleaning while keeping your equipment assembled and your production schedule running.

​How Clean-in-Place Systems Work

Understanding the meaning of CIP starts with how the system circulates cleaning fluids through tanks and piping. The clean-in-place cycle typically begins with a pre-rinse to remove loose soils before any chemicals enter the system. Removing surface debris early protects detergent strength and improves cleaning performance during the next stage.

The detergent phase introduces an alkaline solution that breaks down proteins, fats, and organic soils on equipment surfaces. Pumps drive the solution at controlled flow rates to create the turbulence needed for effective cleaning. Furthermore, sensors monitor temperature, conductivity, and flow to keep every cycle within validated parameters.

An acid rinse follows the alkaline wash to remove mineral deposits, scale, and milkstone from internal surfaces. A final sanitizer cycle eliminates any remaining microorganisms before the system returns to production. Each phase runs on programmed timing so operators get consistent results without manual intervention.

Automated controls record every cycle for verification and regulatory documentation. The data gives your team a clear audit trail and supports ongoing process improvement.

Why CIP Matters for Food Safety and Compliance

The meaning of CIP becomes clear when you look at how strict modern food safety regulations have become. CIP delivers documentation automatically by recording temperature, flow, and chemical concentration on every cycle. Auditors expect to see verifiable cleaning data, and a properly designed CIP program provides it without manual logging.

Cross-contamination risk drops significantly when cleaning happens in a sealed, automated system rather than through manual disassembly. Operators never need to expose product contact surfaces to the open environment between production runs. Additionally, sealed cleaning with a high-quality CIP system reduces the chance of human error introducing pathogens during reassembly.

Product quality also depends directly on the consistency CIP delivers across every cleaning cycle. Variations in cleaning chemistry, temperature, or contact time create residual soils that affect flavor, shelf life, and safety. Furthermore, a validated clean-in-place program eliminates those variables and protects your finished product from batch to batch.

CIP supports compliance with PMO, FDA, USDA, and 3-A sanitary standards across the food and beverage industry. Each cycle generates the records inspectors require to verify your sanitation program meets regulatory thresholds. Strong CIP documentation gives your facility a defensible position during audits and third-party inspections.

Key Components of an Effective Clean-in-Place System

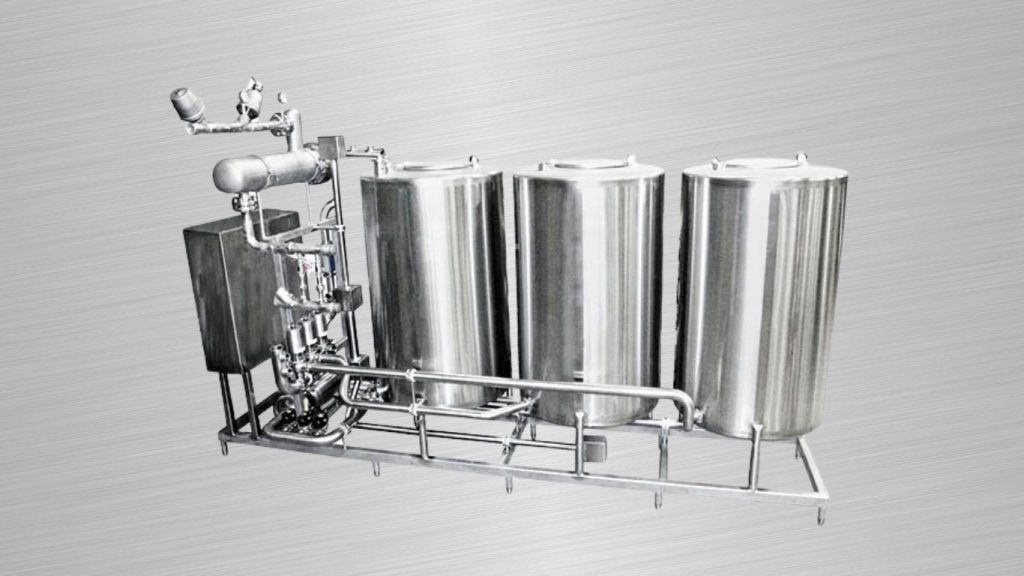
​An effective CIP system depends on integrated components that work together to deliver consistent cleaning results. CIP tanks hold the cleaning solutions, while pumps and piping circulate them through your production equipment at controlled rates. Spray devices distribute solution across interior surfaces to reach every point soil could accumulate.

Heat exchangers maintain solution temperature within the validated range throughout the cycle. Instrumentation, including temperature sensors, conductivity probes, and flow meters, monitors every phase in real time. Furthermore, automated controls coordinate the sequence and record performance data for compliance documentation.

Sanitary valves and fittings keep the system sealed and isolated from product during cleaning. Properly specified components prevent leaks and cross-contamination between CIP and production phases.

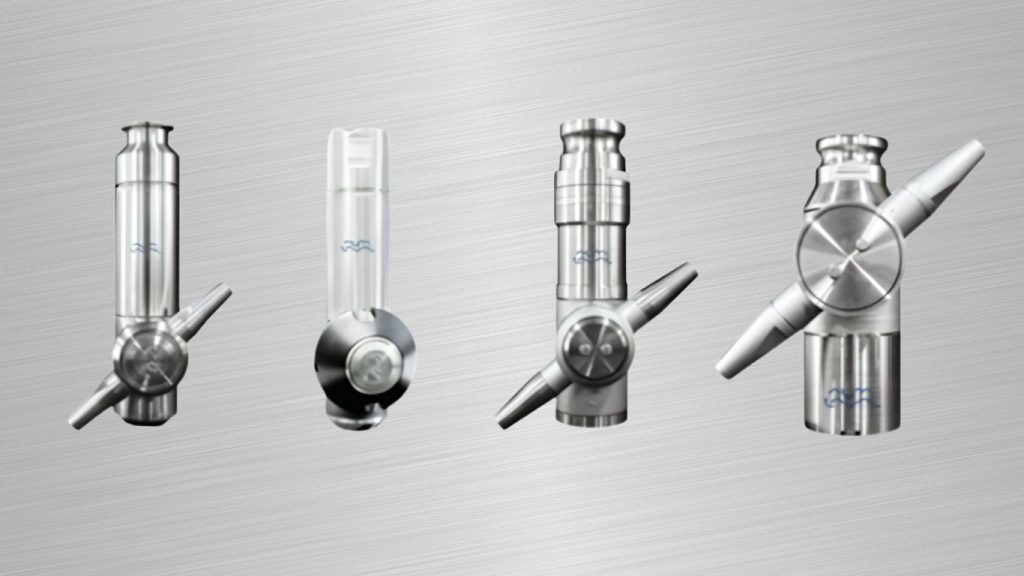
Tank cleaning devices such as rotary jet heads and spray balls also deliver solution coverage within vessels of any geometry. The right device depends on tank size, internal geometry, and the type of soil you need to remove.

System sizing matters as much as component selection for long-term performance. Undersized pumps, tanks, or piping also create cycle bottlenecks that compromise cleaning effectiveness.

Best Practices for Optimizing Your CIP Program

Optimizing your CIP program means moving beyond default settings to a process tuned for your specific soils and production. Small adjustments to chemistry, timing, and equipment configuration deliver measurable gains in cleaning performance and operating cost. Follow these best practices to get the most from your existing system.

  1. Match Chemistry to Soil Type: Use alkaline cleaners for proteins and fats, acid cleaners for mineral deposits, and adjust concentrations based on actual soil load.
  2. Validate Cycle Parameters: Test temperature, flow rate, contact time, and chemical concentration regularly to confirm every cycle meets your validated cleaning thresholds.
  3. Monitor Conductivity and Flow: Use real-time sensors to detect deviations early and prevent failed cycles from reaching the documentation stage.
  4. Inspect Spray Devices Regularly: Check rotary jet heads, spray balls, and nozzles for clogs or wear that reduce coverage and cleaning effectiveness.
  5. Document Every Cycle: Maintain automated logs of temperature, chemistry, and flow data to support audits and identify trends that signal process drift.

Regular reviews of CIP performance data uncover opportunities to reduce water, chemical, and energy use across your facility. Working with an experienced equipment partner helps you identify upgrades that improve cleaning while lowering operating costs. A well-optimized CIP program protects food safety while making your sanitation budget go further.

​Strengthen Your Food Safety Program With a Reliable CIP System

Understanding the meaning of CIP gives you a clearer picture of how modern sanitation drives food safety and compliance. Clean-in-place systems also deliver repeatable cleaning, verifiable documentation, and consistent product quality across every production run. For dairy, cheese, and beverage producers, a well-designed CIP program is non-negotiable. Investing in the right CIP system protects your facility, your product, and your regulatory standing for the long term. Working with an experienced equipment partner ensures your system matches your soils, your equipment, and your production schedule. Work with us at Koss Industrial to design a CIP solution tailored to your facility.

Why Regular Passivation of Stainless Steel Prevents Premature Equipment Failure

Why Regular Passivation of Stainless Steel Prevents Premature Equipment Failure

Stainless steel is the workhorse of every sanitary processing facility, but the metal isn’t invincible without proper care. Passivation of stainless steel restores the protective chromium oxide layer that resists corrosion, contamination, and premature wear. Skip the routine, and your tanks, piping, and processing equipment age faster than they should.

Most equipment failures in food and beverage facilities trace back to neglected surface chemistry rather than mechanical defects. Routine passivation extends service life, protects product purity, and keeps your facility ahead of compliance requirements. Understanding why it matters and when to do it gives you a real edge on long-term reliability.

What Is Passivation of Stainless Steel?

Passivation of stainless steel is a chemical process that removes free iron and other surface contaminants from stainless steel equipment. The treatment restores the chromium oxide layer that gives stainless steel its corrosion resistance. Furthermore, regular passivation protects sanitary surfaces from pitting, rouge formation, and bacterial harborage points that compromise product safety.

​How Passivation of Stainless Steel Works

Passivation of stainless steel uses a controlled chemical treatment to strip free iron, embedded particles, and surface contaminants from stainless steel equipment. The treatment typically applies a citric or nitric acid solution to dissolve unwanted material without attacking the base metal. Furthermore, the process restores the protective chromium oxide layer that gives stainless steel its corrosion resistance.

The chromium oxide layer is what separates stainless steel from carbon steel in the first place. When the layer is damaged or contaminated, the metal underneath becomes vulnerable to corrosion, pitting, and rouge formation. Passivation rebuilds that protective barrier so your equipment performs the way it was designed to.

Temperature, contact time, and acid concentration all influence how effectively the passivation cycle works. Citric acid is increasingly popular because it works at lower temperatures and produces less waste than nitric acid. Additionally, citric acid handles modern sanitary stainless grades like 304 and 316L without the safety concerns nitric acid creates.

After passivation, a thorough rinse and dry cycle prevent residual chemistry from causing problems downstream. Skipping the rinse can leave behind acid traces that interfere with product or compromise weld zones. As a result, every step of the passivation cycle matters for delivering the corrosion resistance your equipment needs.

Signs Your Equipment Needs Passivation

Recognizing the signs your stainless steel equipment needs passivation lets you address surface chemistry before damage spreads. Most warning signs appear during routine inspections if your team knows what to look for. The following indicators consistently signal it is time to schedule a passivation cycle.

  • Discoloration or Rouge: Reddish, gold, or brown stains on stainless surfaces point to iron contamination and oxidation problems.
  • Surface Pitting: Small pits or dimples indicate localized corrosion that compromises both cleanability and structural integrity.
  • Recurring Microbial Failures: Persistent contamination issues despite proper CIP often trace back to compromised surface chemistry.
  • Visible Welding Heat Tint: Discoloration around welds shows damaged chromium oxide that needs passivation to restore.
  • Roughness or Texture Changes: Surfaces that feel rougher than they should suggest accumulated contamination and degraded passive layers.

Catching these signs early gives you the chance to act before damage requires expensive repairs or full equipment replacement. Moreover, addressing surface chemistry on schedule extends service life and protects your compliance position. A documented inspection program makes catching the signs routine rather than accidental.

Risks of Skipping Routine Passivation of Stainless Steel

Skipping routine passivation of stainless steel carries consequences that compound quickly across a production facility. Corrosion, contamination, and equipment failure all trace back to neglected surface chemistry over time. The following risks make the case for keeping passivation on your maintenance schedule.

  • Accelerated Corrosion: Untreated surfaces lose their protective chromium oxide layer, leaving the base metal exposed to chemical attack. As a result, tanks, piping, and fittings corrode at rates that drastically shorten their service life.
  • Rouge and Contamination: Iron oxides accumulate on neglected surfaces and migrate into product during processing. Consequently, your finished product can carry contamination that triggers customer rejections or recalls.
  • CIP Failure: Compromised surface chemistry creates harborage points that resist normal cleaning chemistry. Therefore, your sanitation program loses effectiveness and exposes the facility to microbial contamination.
  • Premature Equipment Failure: Pitting and stress corrosion cracking caused by neglected passivation lead to leaks, weld failures, and capital replacement. Furthermore, unplanned failures take production offline and disrupt your operating schedule.
  • Regulatory and Audit Risk: Visible corrosion, rouge, and pitting raise red flags during inspections and audits. Ultimately, compliance failures cost more in penalties and remediation than years of routine passivation.

Avoiding these risks is straightforward when passivation becomes a documented part of your maintenance program. Moreover, the cost of regular treatment is a fraction of what equipment replacement or recall response demands. Protecting your facility starts with protecting the metal that holds your product.

Building Passivation of Stainless Steel Into Your Maintenance Program

Building passivation of stainless steel into your maintenance program protects equipment without disrupting daily operations. Start by mapping every piece of stainless equipment in your facility and noting service age, exposure conditions, and current surface condition. The inventory becomes the foundation for your passivation schedule and budget planning.

Frequency depends on equipment type, product chemistry, and cleaning aggressiveness. Most facilities benefit from passivation cycles every 12 to 24 months for high-use equipment.

Working with a qualified service provider ensures the chemistry, equipment, and documentation meet industry standards. They handle the technical work while your team focuses on production. Additionally, qualified providers test surfaces after treatment to verify the passive layer has been restored.

Documenting every passivation cycle builds a maintenance record that supports audits and equipment lifecycle planning. The records show inspectors and customers that your facility takes sanitary chemistry seriously. Furthermore, consistent documentation reveals trends in equipment performance and helps you plan replacements before failures occur.

Protect Your Equipment With Routine Passivation

Routine passivation of stainless steel is one of the highest-return maintenance investments you can make in a sanitary facility. The treatment protects against corrosion, contamination, and premature equipment failure across years of demanding production. For dairy, cheese, and beverage producers, the savings show up in equipment life, product quality, and compliance performance.

Investing in regular passivation keeps your stainless steel equipment performing the way it was engineered to. Working with an experienced partner ensures the chemistry, documentation, and verification meet the standards your facility relies on. Engage the Koss Industrial team to support your passivation program and keep your equipment performing at its best.

Maximizing Heat Transfer in a Shell and Tube Heat Exchanger

Maximizing Heat Transfer in a Shell and Tube Heat Exchanger

Every degree matters when you’re moving heat through a processing line. A shell and tube heat exchanger is the equipment doing the heavy lifting, and how well it performs shapes everything from pasteurization quality to your monthly energy bill. Push it past its limits or let efficiency slip, and the costs hit your throughput, your product, and your bottom line.

The good news is that heat transfer performance is highly tunable when you understand what drives it. Flow rates, tube configuration, fouling, and fluid properties all play a role in how much energy your unit can move. Dial those variables in correctly and a shell and tube heat exchanger becomes one of the most efficient assets in your facility.

What Is a Shell and Tube Heat Exchanger?

A shell and tube heat exchanger moves heat between two fluids using a bundle of tubes housed inside a cylindrical shell. One fluid flows through the tubes while the other circulates around them inside the shell. The temperature gap between the two fluids drives heat across the tube walls, delivering efficient and scalable thermal control.

​How Heat Transfer Works in a Shell and Tube Heat Exchanger

A shell and tube heat exchanger moves thermal energy from one fluid to another across the surface of tightly packed metal tubes. Hot fluid flows on one side, cold fluid on the other, and the temperature difference drives heat through the tube wall. Stainless steel construction also meets the temperature, pressure, and sanitary demands of dairy, food, and beverage processing.

The shell encloses the tube bundle and directs the secondary fluid across the tubes in a controlled path. Baffles inside the shell force the fluid to flow in a zigzag pattern, increasing contact time and turbulence. Greater turbulence means better heat transfer because mixing breaks up the slow-moving boundary layer near the tube wall.

Flow direction matters significantly in how much energy the unit transfers per pass. Counterflow designs, where the two fluids move in opposite directions, deliver the largest temperature differential and the highest thermal efficiency. Furthermore, multi-pass configurations extend the contact path to squeeze more performance from a compact footprint.

Material selection rounds out the design by matching tube alloy and shell construction to your product and cleaning chemistry. Sanitary stainless steel meets 3-A standards while resisting corrosion across years of CIP cycles.

Key Factors That Influence Heat Transfer Efficiency

Several variables determine how much heat your exchanger actually moves during operation. Some you control through design choices, while others depend on day-to-day operating conditions and maintenance practices. Understanding each factor helps you pinpoint where performance gains are possible.

  • Flow Rate: Higher fluid velocity creates more turbulence, which improves heat transfer by reducing boundary layer thickness.
  • Temperature Differential: A larger gap between hot and cold fluid temperatures drives more heat across the tube surface per unit time.
  • Tube Surface Area: More surface area means more contact between fluids and metal, directly increasing the total heat transferred.
  • Fluid Properties: Viscosity, density, and specific heat all influence how easily a fluid absorbs and releases thermal energy.
  • Fouling Resistance: Deposits on tube surfaces act as insulation and reduce thermal conductivity over time.

Optimizing one factor in isolation rarely delivers the gains you expect from your equipment. Heat transfer performance comes from balancing flow, temperature, surface area, and cleanliness across the whole system. A well-tuned exchanger gets every variable working together rather than fighting against each other.

Common Causes of Performance Loss and How To Prevent Them

Heat transfer performance rarely drops overnight, but slow declines add up to significant losses in efficiency and product quality. Recognizing the most common failure modes lets you catch problems early and protect your throughput. Address the issues below before they cost you energy, downtime, or compliance.

  • Fouling Buildup: Protein, fat, and mineral deposits insulate tube surfaces and choke heat transfer over time. Schedule regular CIP cycles and acid washes to keep tubes clear and operating at design conditions.
  • Poor Flow Distribution: Uneven flow across the tube bundle leaves cold spots and hot zones inside the unit. Inspect baffle condition and inlet design to confirm fluid moves evenly across every tube.
  • Air Entrainment: Trapped air pockets block direct contact between fluid and tube wall, killing thermal performance. Install proper venting and bleed valves to keep the system fully liquid-filled during operation.
  • Corroded or Damaged Tubes: Pitting, erosion, and leaks compromise both thermal efficiency and product safety. Perform regular inspections and replace tubes before damage spreads through the bundle.
  • Undersized Equipment: An overloaded exchanger cannot meet design specs as production volumes grow. Reevaluate capacity periodically and plan upgrades before performance falls behind your throughput.

Preventive maintenance pays for itself by keeping your exchanger operating at design conditions every shift. Small investments in inspection, cleaning, and monitoring head off the major repairs that take production offline. A reliable exchanger protects both your product and your energy budget every day.

Best Practices for Maximizing Shell and Tube Heat Exchanger Performance

Maximizing performance in a shell and tube heat exchanger requires deliberate attention to design, operation, and maintenance. The right practices keep your unit operating at peak efficiency throughout its service life. Follow these proven approaches to get the most from your equipment.

1. Right-Size the Equipment for Your Process

Sizing the exchanger correctly is the foundation for long-term performance and energy efficiency. An undersized unit cannot meet your thermal demand, while an oversized unit wastes capital and operating cost. Match capacity to your actual production volume and projected growth over the next several years.

2. Optimize Flow Velocity

Flow velocity directly influences turbulence, which drives heat transfer across tube surfaces. Too low, and laminar flow forms an insulating boundary layer that blocks energy movement. Too high, and you risk erosion, vibration, and excessive pressure drop across the unit.

3. Maintain a Strict Cleaning Schedule

Fouling is the single biggest threat to heat transfer performance in any sanitary processing facility. Regular CIP cycles tuned to your soils prevent buildup and protect your design efficiency. Furthermore, scheduled acid washes remove scale and milkstone that alkaline cleaners cannot dissolve.

4. Monitor Performance Data Continuously

Tracking inlet and outlet temperatures, flow rates, and pressure drops reveals performance trends before they become problems. Real-time monitoring catches fouling, flow restrictions, and component wear early in their development. Documented data also supports compliance reporting and root cause analysis during audits.

5. Plan for Inspection and Maintenance Access

Mechanical access matters as much as thermal design when you’re managing long-term performance. Removable tube bundles, manways, and inspection ports make routine maintenance fast and cost-effective. Designing for serviceability extends equipment life and reduces unplanned downtime.

Get More From Your Shell and Tube Heat Exchanger With the Right Partner

Maximizing heat transfer in a shell and tube heat exchanger comes down to thoughtful design, smart operation, and disciplined maintenance. Every variable you control adds up to better thermal performance, lower energy costs, and stronger product quality. For dairy, cheese, and beverage producers, the gains are too significant to leave on the table.

Investing in the right equipment and the right support keeps your operation competitive for the long haul. Working with an experienced manufacturer ensures your exchanger is sized, configured, and maintained to deliver maximum value. Reach out to the Koss Industrial team to map out a heat exchanger that fits your throughput goals.

Maximizing Sanitation Efficiency Using Clean-Out-Of-Place (COP) Tanks

Maximizing Sanitation Efficiency Using Clean-Out-Of-Place (COP) Tanks

Sanitation drives product quality in every food and beverage processing facility, and the right equipment determines how well you meet that standard. COP tanks deliver a systematic approach to cleaning disassembled parts, utensils, and small components that cannot be cleaned in place. For dairy, cheese, and food processors, the right COP tanks mean faster turnaround, stronger compliance, and less manual labor.

Understanding where COP tanks fit in your sanitation program lets you deploy them more strategically across your plant. Modern COP tanks combine heated solution, turbulation, and chemical action to remove soil more thoroughly than hand washing. The result is a repeatable, auditable process that reduces contamination risk and supports regulatory compliance on every shift.

What Are COP Tanks?

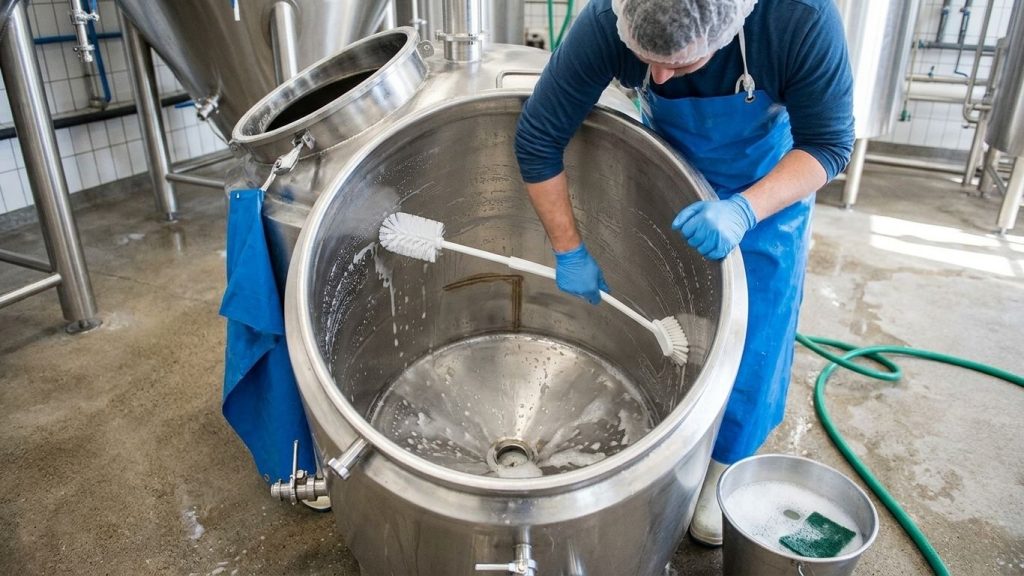
Clean-Out-Of-Place or COP tanks are stainless steel cleaning vessels that sanitize removable equipment parts by submerging them in a heated, agitated solution. Unlike CIP systems, which clean equipment without disassembly, COP tanks handle components that must come off the line for thorough cleaning. You load the parts, and the combination of heat, chemistry, and turbulation handles the rest.

​How COP Tanks Improve Sanitation Efficiency in Food Processing

COP tanks eliminate the inconsistency of manual part washing by standardizing the cleaning process across every shift. You get the same heat levels, chemical concentrations, and turbulation time every cycle, regardless of who operates the equipment. Repeatability is what separates a compliant sanitation program from one that depends on individual effort.

Facilities switching to COP tanks typically reduce cleaning time significantly compared to hand washing methods. Heated solution and mechanical agitation work together to break down proteins, fats, and soils faster than scrubbing alone. Your team spends less time at the sink and more time on production.

Regulatory auditors look for documented, repeatable processes when evaluating your sanitation program. COP tanks give you a verifiable cleaning method with consistent parameters you can record and defend. Strong documentation supports 3-A and USDA compliance standards and holds up under scrutiny.

Transitioning to COP tanks also reduces physical strain on your sanitation crew. Repetitive hand scrubbing of heavy parts and gaskets contributes to fatigue and inconsistent results over a long shift.

Key Features To Look for in a COP Tank System

Not every COP tank is built the same, and the features you prioritize directly affect cleaning performance, uptime, and long-term value. Whether you run a small dairy operation or a large-scale food processing facility, understanding what separates a quality COP tank from a basic one helps you make a smarter investment. The following features are the most important ones to evaluate before you buy.

1. Stainless Steel Construction

Food-grade stainless steel is the standard material for COP tanks in sanitary processing environments. Grades 304 and 316 resist corrosion from cleaning chemicals and repeated thermal cycling, extending the service life of your equipment. Furthermore, stainless construction meets 3-A sanitary standards and holds up under daily high-temperature cleaning cycles.

2. Turbulation System

Effective turbulation drives soil removal beyond what heat and chemistry alone can achieve. Pump-driven agitation keeps solution moving consistently around every surface of the parts you are cleaning. A well-designed turbulation system reaches into tight geometries and recessed areas that static soaking cannot address.

3. Heated Solution Control

Precise temperature control ensures your cleaning solution stays within the optimal range for the chemistry you use. Without reliable heat maintenance, solution temperature drops during long cleaning cycles and reduces cleaning performance. Look for tanks with thermostatically controlled heating elements and clear temperature displays so operators can monitor performance in real time.

4. Tank Sizing and Capacity

Choosing the right tank size for your parts volume prevents bottlenecks in your sanitation workflow. A tank that is too small forces multiple cleaning cycles per shift, adding time and labor to your program. Oversized tanks waste chemical solution and energy on cycles that do not require full capacity.

5. Drain and Accessibility Features

Easy drainage and accessible interiors reduce the time your crew spends on tank maintenance and solution changes. Tanks with sloped bottoms, bottom-mounted drain valves, and removable baskets make daily cleaning and solution turnover straightforward. Well-designed accessibility features also support internal sanitation audits and third-party inspections.

Integrating COP Tanks Into Your Sanitation Program

Adding COP tanks to your facility requires deliberate planning around your existing workflow to get full value from the investment. You need to identify which parts and components require disassembly for cleaning and confirm COP tanks are the right solution for each one. Starting with a clear parts inventory prevents gaps in your sanitation coverage and avoids redundancy with your CIP systems.

Chemical selection plays a major role in how well your COP tanks perform across different soil types. Alkaline cleaners work well for protein and fat removal, while acid-based chemistries address mineral deposits and scale. Working with your chemical supplier to match solution chemistry to your specific soils gives you better results and protects your equipment.

Operator training determines whether your COP tank program delivers consistent results shift after shift. Your team needs to understand correct loading procedures, solution concentration, temperature targets, and cycle times for each part type. Furthermore, documented standard operating procedures tied directly to your COP tank program give supervisors a clear benchmark for performance.

Scheduling COP tank cycles around your production schedule minimizes downtime and keeps parts available when your line needs them. Many facilities run COP cycles during shift changes or scheduled breaks to avoid disrupting production flow. A well-timed schedule also reduces chemical waste and extends solution life between changeouts.

When To Use COP Tanks vs. CIP Systems

COP and CIP systems serve different purposes, and understanding the distinction helps you build a sanitation program with no blind spots. CIP systems clean equipment in place without disassembly, making them ideal for tanks, pipelines, and other fixed infrastructure. COP tanks handle the removable components that come off your line, filling the gap CIP systems cannot address.

Parts like gaskets, fittings, small valves, and disassembled pump components are natural candidates for COP tank cleaning. Hand washing works for some items, but it introduces variability and relies heavily on operator diligence. Moreover, manual cleaning lacks the documentation COP tanks provide for regulatory audits.

Some facilities rely solely on CIP systems and assume all cleaning needs are covered. Every processing line generates removable parts that accumulate soil and require dedicated attention outside the fixed system. Identifying those parts and routing them to a COP tank closes a common gap in food safety programs. A combined CIP and COP approach gives you coverage across both fixed and removable equipment.

CIP handles your fixed infrastructure on a scheduled basis while COP tanks manage removable components daily. Together, both systems give you comprehensive sanitation coverage across your entire operation.

​Take Your Sanitation Program to the Next Level With COP Tanks

Investing in the right COP tanks transforms your sanitation program from a reactive process into a reliable, documented system. You get repeatable cleaning results, stronger compliance, and a workflow that supports your team rather than slowing it down. COP tanks fill a critical role by handling the removable components that keep your line running safely and efficiently.

Building a complete sanitation program means understanding every tool at your disposal and deploying each one where it performs best. When your sanitation strategy is airtight, your facility is better positioned to meet audits, protect product quality, and scale with confidence. Contact the Koss Industrial team today to find the right COP tank solution for your facility.

Using a Pump Curve to Identify Inefficiencies in Your Liquid Line

Using a Pump Curve to Identify Inefficiencies in Your Liquid Line

Your liquid line is only as efficient as the pump moving product through it. A pump curve is the single best tool for understanding whether your pump is operating where it should or burning energy fighting against your system. For dairy, cheese, and beverage processors, reading that curve correctly means catching inefficiencies before they cost you throughput, energy, or equipment life.

Most operators see a pump curve once during installation and never look at it again. The curve maps how flow, pressure, power, and efficiency interact across your pump’s operating range. When you compare actual performance against the curve, hidden problems in your liquid line stop hiding.

What Is a Pump Curve?

A pump curve is a manufacturer-supplied graph showing how a pump performs across its full range of operating conditions. The chart plots flow rate against head pressure, power draw, efficiency, and net positive suction head required. Operators use the curve to confirm a pump runs at its best efficiency point rather than wasting energy at the edges.

​How To Read a Pump Curve

A pump curve looks intimidating at first glance, but the core information is straightforward once you know what to look for. The horizontal axis shows flow rate in gallons per minute, while the vertical axis shows head pressure in feet. Every curve on the graph tells you something specific about how your pump behaves at different operating points.

The main performance line traces the pump’s flow-versus-head relationship across its full range. As flow increases, head pressure drops along the curve.

Efficiency lines overlay the chart to show where the pump runs at its highest energy efficiency. The peak of those efficiency curves is the best efficiency point, or BEP, where your pump is happiest. Running consistently away from BEP wastes power and accelerates wear on seals, bearings, and impellers.

Power draw and net positive suction head required also appear on most pump curves. Tracking those lines against your actual operating point reveals whether the pump has enough margin for safe, efficient performance. Furthermore, the curve helps you spot cavitation risk before it damages your equipment.

Spotting Inefficiencies Using Your Pump Curve

Comparing actual pump performance against the manufacturer’s pump curve reveals problems you might never catch otherwise. Field readings rarely match the curve exactly, but significant gaps point to specific inefficiencies in your liquid line. Three indicators consistently expose where your system is losing energy or capacity.

High Pressure With Low Flow

Operating to the left of the BEP means your pump is fighting more system resistance than it should. High discharge pressure paired with low flow points to a throttled valve, partially closed line, or undersized piping. The pump burns extra energy pushing against the restriction instead of moving product.

Excessive Flow With Low Pressure

Operating to the right of the BEP usually means too little system resistance for your pump’s design point. Excessive flow with low head can indicate oversized piping, a bypass open by mistake, or an undersized pressure relief setting. Pumps running right of BEP draw high amperage and risk motor overload or cavitation.

Power Draw Above the Curve

When your motor draws more power than the curve predicts for a given flow point, something is mechanically wrong. Worn impellers, bearing friction, or product viscosity outside design assumptions all push power consumption higher than expected. Tracking amperage against the pump curve catches developing problems weeks before failure.

Common Causes of Off-Curve Operation

Off-curve operation rarely traces back to a single cause, and the root issue often hides behind symptoms in your liquid line. Catching the problem early starts with understanding what typically pulls a pump away from its design point. The following causes account for most off-curve operation in food and beverage facilities.

  • Closed or Throttled Valves: Partially closed valves add system resistance and shift the pump’s operating point left of BEP.
  • Clogged Strainers or Filters: Accumulated debris restricts suction flow and creates the same pressure drop as undersized piping.
  • Worn Impellers: Erosion and wear reduce impeller diameter, dropping head and flow performance below the curve.
  • Air Entrainment: Air pockets in the suction line cause cavitation, vibration, and erratic performance across the curve.
  • Viscosity Changes: Product temperature, concentration, or composition shifts change fluid viscosity and pull the pump off its design point.

Most off-curve operation traces back to system conditions rather than pump failure itself. Walking your liquid line from suction to discharge often uncovers the source faster than tearing the pump apart. Addressing the upstream cause restores performance without unnecessary equipment work.

Correcting Inefficiencies in Your Liquid Line

Correcting pump curve inefficiencies starts with knowing exactly where your pump is operating today. Field instrumentation, including pressure gauges, flow meters, and amperage readings, gives you the data to plot actual performance against the curve.

Variable frequency drives offer one of the most effective ways to bring a pump closer to its BEP. Adjusting motor speed shifts the operating point along the curve without trimming impellers or changing piping. Additionally, VFDs reduce energy consumption significantly when production demand varies throughout the day.

Right-sizing the pump is the right move when system conditions have drifted far from the original design. Production volume changes, new equipment, or expanded piping all change the duty point your pump needs to hit. A pump correctly matched to today’s system pays for itself in energy savings within a few years.

Working with an experienced equipment partner helps you diagnose, correct, and prevent inefficiencies across your liquid line. Their data interpretation and field experience often catch issues your team misses. A well-tuned liquid line protects throughput, energy use, and product quality every shift.

Tune Your Liquid Line for Peak Performance

Reading and applying your pump curve transforms how you manage efficiency across your liquid line. Catching off-curve operation early protects your throughput, lowers your energy costs, and extends the life of your pumps and piping. For dairy, cheese, and beverage producers, the savings add up fast.

Investing time in pump curve analysis pays off through stronger uptime, lower utility bills, and fewer surprise failures. Working with a partner who knows your process makes that analysis sharper and more actionable. Connect with the Koss Industrial team to fine-tune the pumps and systems driving your liquid line.

A Checklist for Certifying Your Facility as Food Grade Ready

A Checklist for Certifying Your Facility as Food Grade Ready

Getting your facility certified food grade is one of the most important steps in protecting product safety and customer trust. The process touches every part of your operation, from materials and design to sanitation, documentation, and staff training. Miss a single requirement and you risk failed audits, lost contracts, or worse: a recall that damages your brand.

A clear, repeatable checklist gives your team the structure to tackle certification without guesswork. Knowing exactly what auditors look for and where most facilities fall short puts you in a stronger position to pass on the first try. The following guide walks you through what food grade really means and how to prepare your facility from the ground up.

What Does Food Grade Certification Mean?

Food grade certification confirms that your facility, equipment, and materials meet the standards required to safely produce or handle food products. The certification covers everything from product contact surfaces to sanitation programs, pest control, and staff hygiene practices. Achieving food grade status signals to customers, regulators, and partners that your operation takes safety and compliance seriously.

​1. Use 3-A Compliant Food Grade Materials for Product Contact Surfaces

Every surface that touches the product must be made from food-grade materials approved for sanitary processing. Stainless steel grades 304 and 316L are the industry standard for tanks, piping, and processing equipment in dairy, cheese, and beverage facilities. Furthermore, fittings, gaskets, and elastomers should meet FDA, USDA, or 3-A standards to satisfy auditor requirements.

Material traceability documentation proves every component meets specifications and supports your certification process. Auditors expect to see mill certifications, weld documentation, and approved supplier lists for product contact materials. Maintaining the documentation as part of routine operations makes audits smoother and faster.

2. Design Food Grade Equipment for Full CIP and COP Cleaning

Food grade equipment must be designed to clean reliably through CIP or COP cycles without manual scrubbing. Sloped surfaces, smooth welds, and drainable geometries prevent product buildup and bacterial harborage between cleaning cycles.

Spray devices and clean-in-place loops need to reach every interior surface. Dead legs, crevices, and rough welds create points where soil accumulates beyond the reach of cleaning chemistry.

Coordinating equipment design with your sanitation program from day one eliminates expensive retrofits later. Therefore, working with a fabricator who understands sanitary design protects your certification and your production schedule.

3. Build a Documented Sanitation Program for Food Grade Compliance

A documented sanitation program is the foundation of food grade compliance in any processing facility. The program should cover cleaning chemistry, contact times, water quality, and verification procedures for every piece of equipment. Furthermore, written SOPs give your team the structure to deliver consistent results across every shift.

Verification through ATP swabs, microbiological testing, and visual inspection confirms that cleaning protocols actually work. Documented test results give auditors confidence that your program meets requirements in practice, not just on paper. Additionally, trending verification data over time reveals process drift before it becomes a compliance issue.

4. Implement a Verified Pest Control Program

Pest control is non-negotiable in any facility pursuing food grade certification. A documented program with traps, monitoring stations, and routine service visits protects product integrity and satisfies auditor requirements.

Service records, trend reports, and corrective action documentation prove your program works. As a result, auditors can verify both the activity and the outcomes of your pest management efforts.

Working with a licensed pest control vendor familiar with food processing facilities simplifies compliance significantly. Their expertise ensures your program meets both regulatory and customer expectations.

5. Establish an Allergen Control Plan

An allergen control plan protects consumers and your business from one of the most common recall triggers in food manufacturing. The plan should cover ingredient receiving, storage, scheduling, changeover procedures, and validated cleaning between allergen and non-allergen production runs. Furthermore, label verification and supplier audits add critical layers of protection.

Staff training is essential for the allergen plan to actually work in practice. Documented training records show auditors that your team understands and follows the procedures. Moreover, regular refresher training keeps allergen awareness sharp across every shift and department.

6. Enforce Staff Hygiene Policies and Training

Food grade certification depends on staff who consistently follow personal hygiene and sanitation policies. Written policies covering handwashing, uniforms, jewelry, and illness reporting set clear expectations for everyone on the floor.

Documented training and signed acknowledgments prove employees understand and accept the policies. Auditors review these records to confirm your hygiene program reaches every level of the organization.

Enforcement matters as much as documentation. Therefore, supervisors must address violations consistently to maintain the integrity of your hygiene program.

7. Develop a Food Grade HACCP Food Safety Plan

A food grade HACCP plan is the cornerstone of any modern food safety program. The plan identifies critical control points across your process, sets limits for each one, and documents monitoring and corrective action procedures. Furthermore, qualified personnel must develop and review the plan to satisfy regulatory and customer requirements.

The HACCP plan must reflect actual practice in your facility rather than sitting unused in a binder. Regular reassessment, validation studies, and verification activities keep the plan current and effective. Additionally, auditors expect to see active engagement with the plan during their visits.

8. Create a Traceability Program for Materials and Products

A traceability program tracks ingredients, packaging, and finished products from receipt through delivery. The system should support rapid identification of affected materials during a recall or quality investigation.

Lot-level tracking, supplier records, and shipping documentation form the backbone of an effective traceability program. Auditors often request mock recall exercises to verify the system works under pressure.

Modern ERP and traceability software simplify compliance significantly compared to manual recordkeeping. As a result, your team can pull traceability data in minutes rather than days when it matters most.

9. Test Air, Water, and Steam Quality on a Schedule

Air, water, and steam quality directly affect food safety in sanitary processing facilities. Documented testing programs verify these utilities meet the standards required for food grade operations. Furthermore, regulatory bodies and certification auditors expect to see current results during their reviews.

Testing frequency depends on system design, water source, and product type. Working with qualified laboratories ensures results meet regulatory requirements and stand up to scrutiny. Additionally, trending data over time reveals issues before they become contamination events.

10. Design Food Grade Facility Layout for Proper Production Flow

Food grade facility layout supports product safety by separating raw materials, processing areas, and finished goods. Proper flow prevents cross-contamination and supports efficient sanitation throughout the day.

Zoning, traffic patterns, and barrier controls form the foundation of a compliant layout. Air handling and pressure differentials further protect sensitive production zones from outside contamination.

Working with experienced sanitary engineers during facility design or expansion pays dividends throughout the facility’s life. Therefore, layout decisions made early protect compliance and operational efficiency for years.

Get Your Facility Food Grade Ready

Certifying your facility as food grade ready protects product safety, customer trust, and the long-term success of your business. Each item on the checklist contributes to a stronger sanitation, safety, and compliance program. For dairy, cheese, and beverage producers, the investment pays back in every contract you keep and every audit you pass.

Working through the checklist takes commitment, but you don’t have to tackle it alone. An experienced equipment and engineering partner helps you address materials, design, and cleaning requirements with confidence. Schedule a conversation with the Koss Industrial team to bring your facility up to food grade standards.

Selecting the Right Partner for Custom Food Processing Equipment Fabrication

Selecting the Right Partner for Custom Food Processing Equipment Fabrication

Custom food processing equipment lives at the center of every successful production line. The wrong fabrication partner can saddle you with equipment that misses spec, fails inspection, or breaks down at the worst possible moment. The right partner delivers gear that fits your process, meets sanitary standards, and earns its place on your floor for years.

Choosing that partner means looking past flashy quotes and slick websites to evaluate what really matters. Engineering depth, sanitary expertise, materials, controls, and aftermarket support all shape the long-term value of your investment. Knowing what to look for puts you in a stronger position to make a decision your operation can stand behind.

What To Look for in a Food Processing Equipment Fabricator

A strong food processing equipment fabricator combines engineering capability, sanitary expertise, and proven manufacturing quality under one roof. Look for in-house design, machining, welding, and controls so your project moves through one accountable team. Furthermore, certifications like 3-A, ASME, and UL508A signal a partner who takes compliance and craftsmanship seriously.

​1. Engineering and Design Capabilities for Custom Food Processing Equipment

A fabricator’s engineering depth determines whether your custom food processing equipment fits your process or fights against it. In-house mechanical and process engineering teams catch problems on paper before they show up in your facility. Furthermore, dedicated engineers can model flow, sanitation, and thermal performance against your specific product before steel ever gets cut.

Electrical engineering capability matters just as much as mechanical design in modern processing equipment. Without it, your fabricator depends on third parties who may not understand your sanitary or compliance requirements.

3D modeling and simulation tools help your partner visualize complex assemblies and identify clearance, drainage, or access issues early. As a result, you avoid costly field changes and installation delays that derail your project timeline. Additionally, modeling lets you walk through the equipment virtually before approving the final design.

Strong engineering teams also document every decision through detailed drawings, P&IDs, and specifications. The documentation supports startup, training, and future modifications across the equipment’s life. Working with a partner who treats engineering as core to their service protects your investment from day one.

2. Manufacturing Quality and Sanitary Standards for Food Processing Equipment

Manufacturing quality separates fabricators who build equipment that lasts from those who deliver problems waiting to happen. Sanitary fabrication demands precision welding, proper surface finishing, and strict adherence to industry standards. Below are the manufacturing benchmarks that signal a fabricator capable of producing food processing equipment built to last.

  • 3-A Sanitary Standards Compliance: Confirms equipment meets the dairy and food industry standards for cleanability and product contact materials.
  • ASME Code Welding: Demonstrates that pressure vessels and critical welds meet rigorous quality and inspection requirements.
  • Certified Welders: Indicates the fabricator employs qualified personnel trained in sanitary stainless steel welding techniques.
  • Material Traceability: Provides documentation linking every piece of stainless steel back to its mill certification and grade.
  • In-House Polishing and Finishing: Ensures product contact surfaces meet specified Ra values for cleanability and corrosion resistance.

Verifying these benchmarks before signing a contract protects your facility from compliance failures and premature equipment wear. Moreover, requesting weld samples, finish certifications, and material documentation shows a fabricator’s transparency about their work. A partner who welcomes that scrutiny is one you can trust with your custom equipment program.

3. Controls, Automation, and Integration Expertise

Modern food processing equipment depends on control systems that match the sophistication of the mechanical design. A fabricator without strong automation capability creates gaps between hardware and the PLCs, HMIs, and SCADA systems that run your facility. Therefore, choosing a partner with integrated controls expertise eliminates the finger-pointing that happens when problems cross disciplines.

UL508A-certified control panel fabrication is a baseline requirement for any partner building electrical enclosures for your equipment. The certification confirms panels meet industry standards for safety, wiring practices, and component selection. Additionally, certified panels simplify permitting, inspections, and insurance compliance across your facility.

Automation programming capability also matters for equipment that integrates with your existing production lines. Your partner needs experience writing PLC code, configuring HMIs, and integrating with plant-wide data systems.

Instrumentation calibration and field commissioning round out the controls package. Without those services, you spend extra time and money bringing in third parties to finish what your fabricator started.

Working with a partner who delivers mechanical, electrical, and controls under one roof gives you a single point of accountability. The integration eliminates schedule risk and protects your project budget.

4. Service, Support, and Long-Term Partnership

The relationship with your fabricator does not end when equipment leaves their shop floor. Custom food processing equipment requires startup support, troubleshooting, and ongoing maintenance throughout its service life. Therefore, choosing a partner committed to long-term support protects your investment well after commissioning.

Field installation and commissioning services bridge the gap between fabrication and full production. Experienced field teams handle mechanical setup, electrical termination, and process tuning at your facility. Furthermore, on-site startup ensures your equipment meets design specs before it ever runs commercial product.

Parts availability and service kit support keep your equipment running when components wear out or fail unexpectedly. A partner who stocks common spares reduces downtime and protects your production schedule. Working with a fabricator who serves as a distributor for sanitary pumps, valves, and instrumentation simplifies sourcing across your facility.

Long-term support also includes responsiveness when problems arise weeks, months, or years after installation. A partner who picks up the phone and dispatches help quickly protects more than just the equipment they built. Ultimately, that responsiveness reflects the kind of partnership your operation needs for sustained success.

5. Evaluating Food Processing Equipment Fabrication Partners

Evaluating fabrication partners requires looking past quote prices to assess the full value they bring to your operation. Ask for references, walk their facility, and review documentation samples before committing to a project. Furthermore, transparent fabricators welcome the scrutiny because they know it builds confidence in their work.

Experience in your specific industry matters more than general fabrication credentials. A partner who has built equipment for dairy, cheese, or beverage producers understands the standards, soils, and sanitation challenges you face. Their familiarity translates into smarter design choices and fewer surprises during commissioning.

Capacity and project management capability shape whether your partner can deliver on time and on budget. Ask about their current workload, lead times, and how they handle change orders during the build. Additionally, look for project managers who communicate proactively rather than waiting for you to ask for updates.

Finally, evaluate cultural fit alongside technical capability. Your fabricator becomes an extension of your engineering and operations teams over the life of a custom project.

Build Better Food Processing Equipment With the Right Partner

Selecting the right fabrication partner shapes the success of every piece of custom food processing equipment you bring into your facility. The right relationship delivers stronger engineering, better quality, smoother controls integration, and dependable long-term support. For dairy, cheese, and beverage producers, the partnership pays dividends across years of production.

Investing time in vendor evaluation protects your capital, your schedule, and your operational performance. Working with an experienced fabricator who treats your project as their own makes every decision easier. Share your project requirements with Koss Industrial and we’ll fabricate equipment built for your floor.

How to Improve Energy Efficiency in Your Facility Heat Exchangers

How to Improve Energy Efficiency in Your Facility Heat Exchangers

Heat exchangers move the energy that keeps your processing line running, and how well they perform shapes your utility bill every month. Even a small efficiency loss across multiple units adds up to thousands in extra fuel, steam, and electricity costs over a year. For dairy, cheese, and beverage producers, the savings sitting inside a well-tuned heat exchanger program are too significant to leave on the table.

Improving energy efficiency starts with understanding where losses actually come from. Fouling, undersized equipment, poor maintenance habits, and missed design opportunities all chip away at performance. The right combination of design, operation, and upkeep recovers real efficiency across every unit on your floor.

What Drives Heat Exchanger Energy Efficiency?

Heat exchanger energy efficiency depends on how effectively the unit transfers thermal energy between two fluids with minimal waste. Surface cleanliness, flow rates, temperature differentials, and equipment sizing all influence how much energy moves through the system. Furthermore, regular maintenance and operational discipline determine whether your heat exchangers stay at peak performance over time.

​How Heat Exchangers Lose Energy Efficiency

Fouling is the leading cause of energy loss in food and beverage processing heat exchangers. Proteins, fats, minerals, and microbial films build up on tube and plate surfaces, insulating the metal and blocking thermal transfer. As a result, your system burns more steam or electricity to maintain the same outlet temperatures.

Flow problems quietly drain efficiency in ways that often go undetected. Air entrainment, uneven flow distribution, and partial blockages reduce contact between fluid and heat transfer surfaces. Furthermore, low flow velocity allows boundary layers to thicken, insulating tubes from the very fluid they should be heating or cooling.

Equipment sizing also affects long-term efficiency more than most operators realize. An undersized unit runs constantly at maximum load, consuming excess energy and wearing out components faster. Conversely, an oversized unit operates well below its design point and wastes capital, footprint, and operating cost.

Maintenance neglect compounds every other inefficiency over time. Worn gaskets, eroded tubes, and degraded surface finishes all chip away at performance. Therefore, a heat exchanger that looks fine from the outside may still be costing you thousands in avoidable energy use.

Design Strategies for More Efficient Heat Exchangers

Smart design choices made upfront eliminate years of energy waste from your facility’s heat exchangers. Selecting the right configuration, sizing, and materials sets the foundation for long-term thermal performance. The following design strategies deliver the biggest gains in heat exchanger efficiency.

  1. Specify Counterflow Configurations: Counterflow designs deliver the largest temperature differential and the highest thermal efficiency across the unit. The configuration extracts more energy per pass than parallel flow alternatives.
  2. Right-Size for Actual Demand: Match unit capacity to your real production volume and growth projections instead of generic baselines. Therefore, you avoid running undersized or oversized equipment that wastes energy and capital.
  3. Optimize Tube and Plate Surface Area: More heat transfer surface area increases the energy transferred per cycle without raising operating temperatures. Additionally, properly-sized surface area reduces pressure drop and pumping costs.
  4. Select Materials for Corrosion Resistance: Stainless steel grades 304 and 316L resist corrosion and maintain smooth surfaces that support efficient heat transfer. Furthermore, corrosion-resistant materials extend service life and reduce fouling rates.
  5. Plan for Easy Access and Maintenance: Removable tube bundles, manways, and inspection ports make routine cleaning and inspection fast. Consequently, your team can sustain peak efficiency without major downtime.

Applying these design principles together delivers compounding gains across your facility’s thermal program. Moreover, working with an experienced sanitary equipment partner ensures your design balances efficiency, sanitation, and operating cost. A well-designed unit pays back its design effort many times over through energy savings.

Maintenance Practices That Protect Energy Performance

Even the best-designed heat exchangers lose efficiency without disciplined maintenance attention. Routine practices catch fouling, wear, and operational drift before they translate into higher energy bills. The following maintenance practices deliver measurable energy savings across your heat exchanger program.

1. Schedule Regular CIP and Acid Cleaning

CIP cycles tuned to your specific soils prevent the buildup that insulates tubes and plates from product fluid. Acid washes follow alkaline cleaning to dissolve mineral scale and milkstone that alkaline chemistry alone cannot remove. Furthermore, validated cleaning chemistry, temperature, and contact time protect efficiency without overusing chemicals.

2. Monitor Temperature and Pressure Trends

Tracking inlet and outlet temperatures, flow rates, and pressure drops reveals performance trends before they become problems. Even small increases in pressure drop or decreases in outlet temperature signal early fouling or flow restriction. As a result, your team catches issues weeks before they show up as energy waste.

3. Inspect Gaskets, Seals, and Tube Bundles

Worn gaskets and damaged seals allow leaks that compromise both efficiency and sanitary integrity. Eroded tubes and plates lose surface area and thermal performance over time. Regular inspections during scheduled downtime catch these issues before they escalate into emergency repairs.

4. Maintain Accurate Documentation

Documented maintenance activities and performance data build a baseline for comparing current performance against design. The records support both energy management initiatives and regulatory compliance reporting. Additionally, a strong maintenance history makes troubleshooting faster when problems do appear.

Upgrading and Right-Sizing Your Heat Exchangers

Older heat exchangers eventually reach the point where upgrades deliver better returns than continued repairs. Newer designs offer improvements in materials, surface geometry, and control integration that older units simply cannot match. As a result, an upgrade often pays for itself faster than operators expect.

Right-sizing existing equipment to current production demand recovers efficiency in many facilities. Production volume changes, new product lines, or expanded operations all shift the duty point your units need to hit.

Variable frequency drives on associated pumps and fans bring heat exchanger operations closer to their optimal performance point. Adjusting flow rates dynamically based on demand reduces energy consumption significantly during partial-load operation. Additionally, VFDs extend equipment life by reducing mechanical stress during low-demand periods.

Working with an experienced equipment partner makes upgrade and right-sizing decisions sharper and more cost-effective. Their data analysis and field experience identify the highest-return improvements for your specific operation. Therefore, partnering with the right team turns capital investment into measurable energy savings.

Improve Energy Efficiency Across Your Heat Exchanger Program

Improving energy efficiency in your heat exchangers protects margins, throughput, and product quality across your operation. Every improvement compounds with the others to deliver significant savings over months and years of production. For dairy, cheese, and beverage producers, the gains hit your bottom line every single month.

Investing in better design, disciplined maintenance, and timely upgrades keeps your facility competitive for the long term. Working with an experienced sanitary equipment partner makes every decision more confident and more profitable. Hand your heat exchanger efficiency challenges to the Koss Industrial team and we’ll engineer a smarter, more efficient program.

Comparing Batch Pasteurization and HTST for Specialized Cheese Production

Cheese producers face a critical decision when choosing between batch pasteurization and high-temperature short-time (HTST) pasteurization for their operation. Both methods meet regulatory requirements, but each serves a different production model. Understanding where each excels helps you match your pasteurization system to your cheese program.

Batch pasteurization holds milk at a lower temperature for a longer period, giving cheesemakers more control over thermal treatment of delicate cultures and enzymes. HTST moves milk continuously through a plate heat exchanger at higher temperatures for a much shorter time, prioritizing throughput over flexibility. For specialty cheese producers, the differences between these two approaches directly affect flavor, texture, and yield.

Batch Pasteurization vs. HTST

Batch pasteurization uses low heat over a longer hold time, giving specialty producers more control over culture and enzyme preservation. HTST runs milk continuously at higher temperatures for a fraction of the time, making it better suited for high-volume operations. The right choice depends on your production scale, target cheese style, and how much process flexibility your program requires.

​How Batch Pasteurization Works in Cheese Production

Batch pasteurization heats milk to a minimum of 145°F and holds it there for at least 30 minutes, as per USDA Standards. The hold period eliminates target pathogens while preserving more of the milk’s native proteins and enzymes than higher-heat methods. Cheesemakers rely on that thermal gentleness to protect the components that drive culture performance and curd development.

The process runs in a jacketed tank where hot water or steam circulates through the outer wall to heat milk evenly. An agitator keeps milk moving throughout the cycle to prevent hot spots and maintain uniform temperature. Once the hold time ends, the system cools the milk rapidly before the next production stage.

Batch pasteurization gives operators direct control over ramp time, hold temperature, and cooling rate. Furthermore, that level of control makes it easier to fine-tune the process for different milk types and target cheese styles. The batch format also handles smaller volumes without the minimum flow requirements that continuous systems demand.

Cleaning and changeover between batches adds time compared to continuous pasteurization methods. Operators must sanitize the tank between runs, which limits throughput for high-volume facilities.

Batch Pasteurization vs. HTST: Key Differences for Specialty Cheese

Batch pasteurization and HTST meet the same regulatory standard but operate on fundamentally different principles. Batch systems treat milk in discrete volumes at lower temperatures over longer hold times, while HTST moves milk continuously at higher temperatures for 15 seconds. The differences directly affect milk quality, throughput, and process flexibility for specialty producers.

  • Batch pasteurization heats milk to 145°F for 30 minutes while HTST heats milk to 161°F for 15 seconds.
  • Batch systems preserve more native proteins and enzymes, supporting better curd structure in specialty cheese.
  • HTST delivers significantly higher throughput, processing thousands of gallons per hour.
  • Batch pasteurization gives operators more flexibility to adjust thermal parameters between runs.
  • HTST requires higher capital investment and more complex equipment, including flow diversion valves.

For specialty and artisan producers, batch pasteurization aligns better with small-batch production and diverse product lines. HTST makes more sense when volume is the priority and process flexibility is less critical.

When Batch Pasteurization Is the Right Choice for Your Operation

Specialty cheesemakers benefit most from batch pasteurization when product quality outweighs the need for high throughput. Lower thermal exposure preserves the native proteins, fats, and enzymes that contribute to flavor and curd integrity. For cheese styles where milk character defines the product, batch pasteurization protects what makes it distinctive.

Facilities producing multiple cheese varieties benefit from the flexibility batch systems offer between runs. You can adjust hold temperatures, ramp rates, and cooling profiles to suit different milk types and starter cultures. Additionally, switching between recipes requires no changes to continuous flow equipment.

Smaller operations and farm-based creameries find batch pasteurization practical because it scales to their production volume. A batch tank processes exactly the volume you load, making it efficient for facilities with limited daily supply. HTST systems require minimum flow rates that create inefficiencies at lower volumes.

Regulatory compliance is also more straightforward with batch pasteurization for many small producers. The process is well-documented, widely understood by inspectors, and requires less instrumentation than continuous systems. For facilities working toward PMO compliance, batch pasteurization offers a clear and auditable path.

​Choosing the Right Batch Pasteurizer for Your Facility

Selecting the right batch pasteurizer requires evaluating factors specific to your production environment and growth plans. The wrong system creates bottlenecks, limits your product range, or generates compliance headaches that slow your operation. Consider each criterion carefully before committing to a system.

  1. Tank Capacity: Match tank size to your daily milk volume and batch frequency to avoid bottlenecks or underutilization.
  2. Heating Method: Choose between hot water jacket, steam injection, or direct steam based on your utilities and the thermal precision your program requires.
  3. Agitation Design: Confirm the agitator style and speed range suit your milk type without damaging delicate proteins during hold.
  4. Controls and Monitoring: Look for temperature recorders, automated hold timers, and data logging that support PMO compliance and simplify documentation.
  5. Cleanability and Sanitary Design: Verify the tank meets 3-A sanitary standards with smooth welds, proper drainage, and spray coverage for CIP or COP cleaning.

The right batch pasteurizer balances capacity, control, and sanitary design to support your cheese program for the long term. Working with an experienced equipment partner ensures your system is sized and configured correctly from day one. A well-matched pasteurizer protects both your product quality and your bottom line.

​Build a Stronger Cheese Program With the Right Pasteurization System

Choosing between batch pasteurization and HTST comes down to your production scale, cheese styles, and how much process control your program demands. Batch pasteurization gives specialty producers the thermal gentleness and flexibility needed to protect milk quality and support diverse product lines. For artisan cheesemakers and smaller operations, it remains the most practical path to compliant, high-quality production.

Investing in the right batch pasteurizer sets the foundation for consistent results and long-term growth. Working with an experienced equipment partner ensures your system matches your facility, your milk supply, and your compliance requirements. Reach out to the Koss Industrial team to find the right batch pasteurization solution for your operation.

Improving Portion Control With a High-Precision Commercial Cheese Cutter

Improving Portion Control With a High-Precision Commercial Cheese Cutter

Portion variance in cheese processing costs manufacturers money. Every cut that runs heavy gives away product at full cost. Every cut that runs light creates a complaint or a compliance issue. At scale, those errors add up fast. A commercial cheese cutter fixes the problem by replacing manual cutting with automated portions that hit the same weight every cycle.

Why Portion Control Matters at Scale

Cheese yield is one of the most closely tracked numbers in a dairy plant. Research on cheese yield efficiency shows that a difference of just 0.1 percent in yield over a full year has a large effect on plant profits. That means portioning is not just a quality issue. Instead, it’s a financial one, one that shows up on every shift.

A heavy-duty Koss Industrial cheese cutter designed as a reliable commercial cheese cutter

Manual cutting adds error at every step. The angle of the cut changes while the force applied varies. The worker’s speed shifts from the start of a shift to the end. Each of those variables affects the final portion weight. In contrast, a commercial cheese cutter applies the same motion, the same force, and the same speed on every cycle. That cuts the gap between actual and target weight. For plants cutting hundreds of portions per hour, even a small drop in giveaway adds up to real money over a year.

Dairy Foods has also reported that many U.S. cheese plants are working to cut fat and casein losses at the processing stage. In fact, cutting accuracy is one of the key variables that affects both yield and product quality. That makes the choice of cutter a business decision, not just an equipment one.

What a High-Precision Commercial Cheese Cutter Does Differently

A basic cutter gets through product. A high-precision commercial cheese cutter does that while staying within a tight weight range on every portion. The key is how the system is built.

Precision cutters use cutting tools matched to the cheese type and block shape. Soft, wet cheeses act differently under a blade than firm, aged ones. For that reason, a good commercial cheese cutter handles the full range of products the plant runs, not just the easy ones. Beyond that, it holds that accuracy across a full shift. Systems that drift as parts wear produce the same giveaway problem that manual cutting creates. They just do it more slowly and quietly. So wear part schedules and service access are part of the buying decision from day one.

Sanitary Design in a Dairy Environment

All cutting tools in a dairy plant must meet sanitary design rules. In particular, product contact surfaces must be smooth, easy to clean, and safe for use with Clean-In-Place (CIP) chemistry or manual washdown. Stainless steel is the base requirement. Beyond that, frame design matters. Open frames with sloped, drainable surfaces clean faster. They also reduce the risk of bacterial growth between production runs.

A Koss Industrial mozzarella slicing machine operating as a specialized commercial cheese cutter.

3-A Sanitary Standards, Inc. (3-A SSI) sets the hygiene design rules for dairy processing equipment. Any commercial cheese cutter going into a regulated plant should be checked against those rules during the buying process. Checking after install is too late.

Matching the Commercial Cheese Cutter to the Line

No single commercial cheese cutter works for every plant. Block size, cheese type, target weight, and required output all drive the choice. A plant cutting 40-pound blocks of cheddar into retail packs has different needs than one cutting soft wheels into wedges for food service. Even so, the goal is the same in both cases: hit the target weight, every time, all shift long.

Before buying, write down the product range the cutter must handle. Set the target weight and the range of error that is acceptable. Define the required output per hour. Confirm what cleaning method the system must support. Getting those details on paper first prevents a mismatch between what was bought and what the line needs. That step is simple. It also avoids a costly fix later.

Koss Industrial builds and stocks commercial cheese cutters for dairy and cheese plants. In-stock options are ready for fast delivery. For plants with unique block sizes or weight targets, the Koss team can discuss a custom build. Reach out to contact our team directly.

We are a leading manufacturer of custom stainless steel equipment for the cheese, dairy, food, beverage and other sanitary industries.

Contact Info


© By Koss Industrial, Inc.  All Rights Reserved.